5 Tools for Easier Gainz. Training Edition
As a follow up to my 5 Tools for Easier Gainz Nutrition Edition, I thought I’d share with you my favourite Training tools.
These bad boys will help you in your quest to be stronger, more muscular and generally more awesome.
So without further ado let’s take a look.
1. A Weightlifting Belt
If you’re serious about your lifting then I strongly recommend getting yourself a good quality weightlifting belt.
Proper use of a belt may (1):
- Increase bar speed, which may be related to strength.
- Perform more reps with a given load.
- Increase muscle activation. More of this may mean more muscle hypertrophy (AKA getting hyooge)
- May prevent injury
However, don’t get a belt if you have issues with blood pressure or have a hernia. If you’re in doubt, chat to a health professional well versed in lifting, like a sports physio.
A good quality weightlifting belt is NOT one that you get with a supplement manufacturer’s logo on the back of it, nor is it one that you get from Argos.
I recommend getting yourself a thick leather belt like this Strength Shop Lever Belt (this is the one I use and it’s been brilliant):
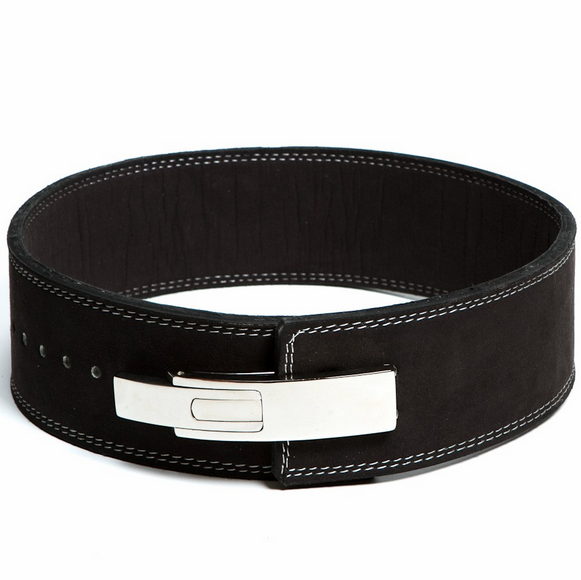
Or a double or single prong belt like this one.
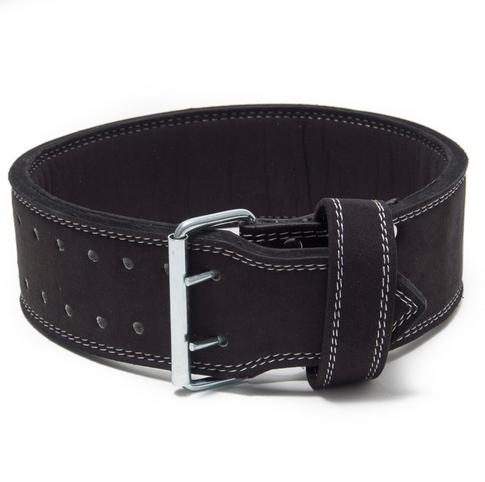
The lever belts are more expensive, but the main difference between them and the pronged belts is that the lever belts are easier to get off and on, and potentially allow you to wear them a little tighter to increase intra abdominal pressure.
We want intra abdominal pressure to be high when lifting heavy, because it protects the spine and stabilises the pelvis. It might also make certain muscles “work harder” as your body has more resources so to speak to send to them as it doesn’t have to worry about protecting your spine.
You can buy a double pronged belt HERE or a lever belt HERE.
(1) If you want to know more about the use of a belt, I recommend you check out this article here by someone who is about 1,000,000x smarter than me, Mr Greg Nuckols:
>>> The Belt Bible <<<
2. Paused Variations of Your Lifts
These suck balls and are incredibly uncomfortable but by heck they are effective.
Paused variations of your lifts may have the advantage of:
- Increasing time under tension of your target muscles. This may equal more hypertrophy.
- Taking momentum out of the movement and keep you more honest with your technique.
- Increase confidence with a given load.
- Increase training volume whilst reducing stress on your body. This is because when you perform paused reps you’ll have to reduce the load on the bar.
- Help you strengthen the range where your sticking points occur. Ever failed a squat or bench press through some point in the movement? Paused work will help with this.
You could perform paused variations of more or less any lift, but they are mainly used with the powerlifts; the squat, bench press and deadlift. They can be done pausing at any point in the lift but if you are new to performing them I recommend checking out the videos below to see how they are traditionally performed.
Squat
Bench Press
Deadlift
A video posted by James Blanchard (@jbtrainnutri) on
3. Olympic Weightlifting Shoes
Olympic weightlifting shoes are a shoe with a rock hard sole to increase stability, as well as having a raised heel. This raised heel helps keep us more upright in the squat, as it allows the knees to travel forward more compared to when we have our feet on a flat surface.
This helps increase quad activation (= bigger quads!) as well as an upright torso potentially having the benefit of putting less stress on the spine.
If you tend to fall forward in the squat and shoot your arse up in the air when you come out of the bottom position OR if you’ve got poor ankle mobility (that’s most of us) then I definitely recommend you get some Olympic weightlifting shoes, at least while you work on improving your mobility.
When compared to wearing running shoes or similar, Olympic weightlifting shoes win hands down in terms of their stability. Running shoes/trainers have cushioning for shock absorption. This is bad news whilst lifting as the cushioning leads to a decrease in stability, and causes you to leak energy when you want all of the force your muscles are providing to travel through the floor/bar.
The great thing with a pair of lifting shoes, is that as you’ll likely only wear them ~3 hours a week or so, you’ll probably only need 1-2 pairs in a lifetime (unless you’re a tart like me and have them as a fashion accessory…) so try not to be too put off by the cost, as they’re actually quite good value in this regard.
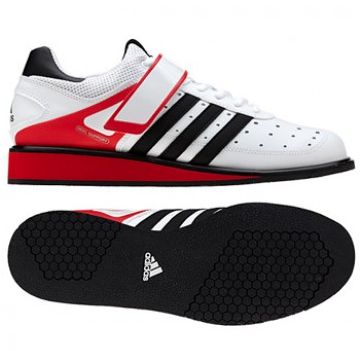
I’ve got myself a badass pair of neon Nike Romaleos (see below) but at £170 a pop they aren’t cheap.

However, Adidas and Reebok do cheaper pairs that still do just as good a job.
If I had to pick I’d go with the Adidas Power Perfect II (see below) as they have a good sized heel, are pretty sturdy and seem to fit true to size, as well as being almost half the price of the Romaleos.
You can buy the Adidas Power Perfect IIs HERE for what I found as the cheapest price on the net from Start Fitness, £89.95 at time of writing.
4. D.U.P or Daily Undulating Periodisation
If you wanted to get better at something, how many times a week would you do it?
Twice?
Three times?
Maybe every day?
Regardless of how many times you think we should be doing something to get better, I’m sure we can all agree on one thing…
Practicing skills more frequently makes you better at them!
Yet unfortunately this doesn’t always hit home with many lifters or gym users; they often just perform each lift or train a muscle group once per week. This is certainly not optimal if their goal is to get better at that lift or grow that muscle!
Strength is still a skill that you have to learn, therefore frequent practice is effective in improving it (even if your goal isn’t strength itself, it’s still important even in increasing hypertrophy)!
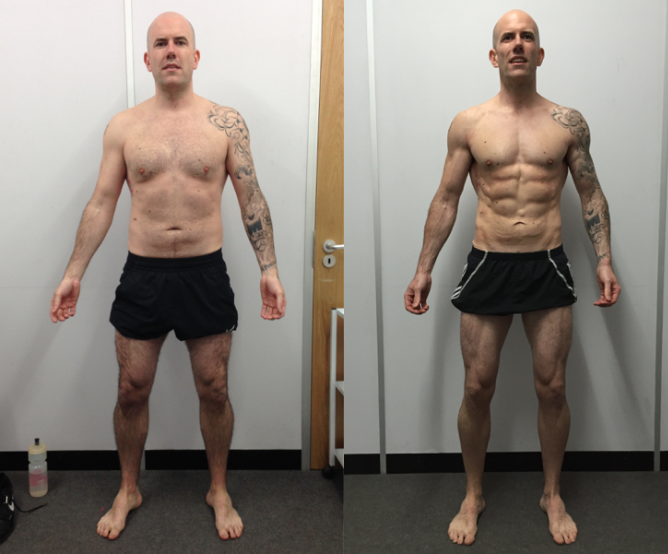
As an example, two of my clients, Dan and Warren, each added a fair bit of weight onto their deadlift 1RM, with 20 and 45kg respectively (180>200kg and 160>205kg) in 8 weeks, mainly by increasing the frequency with which they deadlift, going from once per week to 4 times per week!
The “Daily” part of D.U.P refers to the high frequency of training, where you train a lift or hit a muscle group 3 or more times per week.
The “Undulating” part refers to the wave like changes in volume or intensity that occurs from session to session. This prevents stagnation and drives progress.
The “Periodisation” part refers to how you structure the program according to your goals over time. For example, one month might be a higher volume block, followed by a higher intensity block. It also refers to how the load changes on a daily basis, for example Monday might be a heavy day, Wednesday a light load day and Friday a medium day.
I’m not going to put a full program up to show you how it works because that’s unfair to my clients who pay for me to do this for them. However, here’s a way it could work for the bench press;
Monday (Heavy)
Bench press 5 sets of 3 reps @85% of your 1RM
Wednesday (Light)
Bench press 3 sets of 10 reps @65% of your 1RM
Thursday (Accessory work)
Here you’d do any accessory work such as rows, chins etc. that would hit all your weak points, or you could sprinkle them during the other training sessions in the week.
Friday (Medium)
Bench press 4 sets of 6 reps @75% of your 1RM
Try to progress from one workout to the next, adding 2.5kg a side to the bar to slowly move things along, or by adding an extra set or increasing the reps.
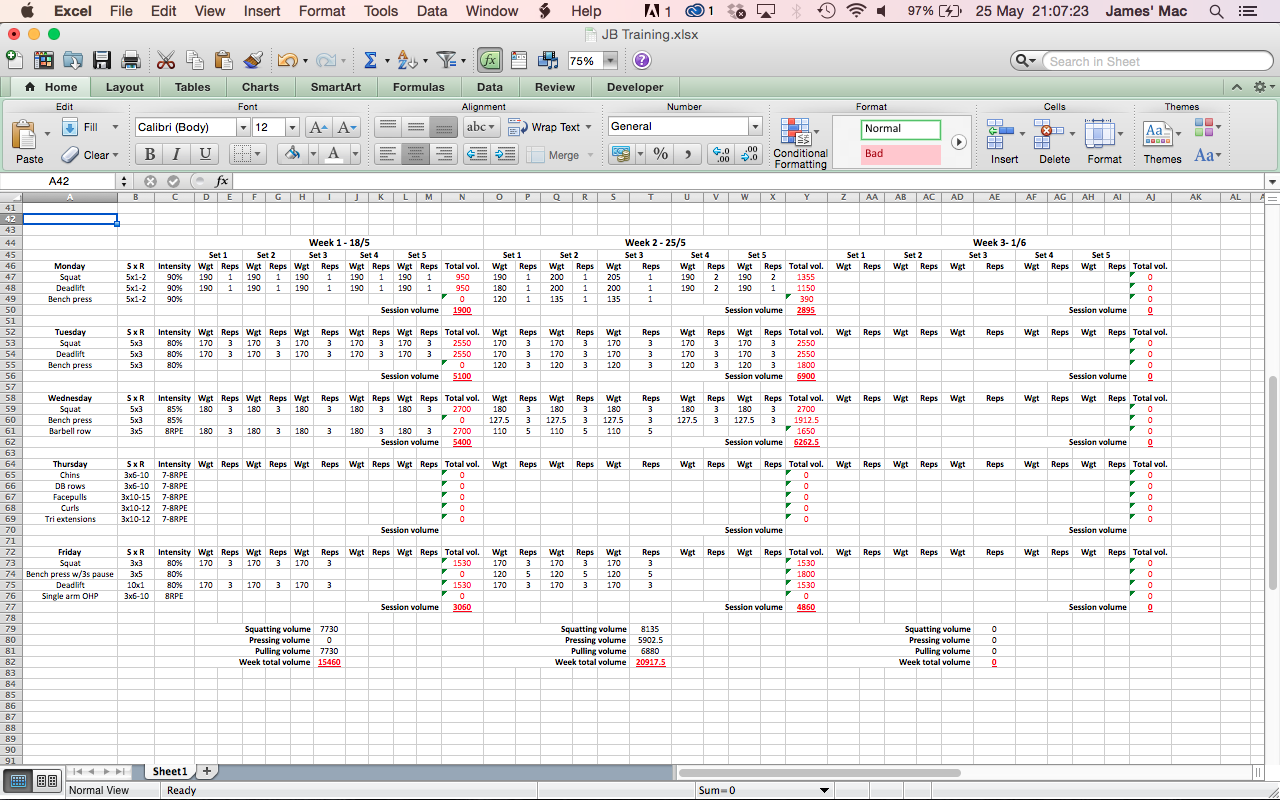
5. Microsoft Excel
Call me a nerd if you want (hey, it’s the truth) but I believe that Excel is a highly effective training tool!
Allow me to explain.
Ensuring that your training volume increases over time is one of the most important things you can do as it is what drives progress. Without logging your training at least on a notepad or in your phone, you’re literally pissing in the wind.
Training volume = weight lifted x reps x sets
I’d only count training volume in the weights that you lift that are 65% and over of your 1RM as anything lighter isn’t likely heavy enough to create a beneficial effect.
If you log your training into MS Excel you can quite easily calculate your training volume and track your improvement over time.
Not only is this motivating to see progress over time, but if you focus on increasing your volume in the 65-85% range by a small amount each week, and can do this consistently for months, I GUARANTEE that at the end of it you’ll be bigger and stronger.
Remember that adding weight onto the bar isn’t the only way to add volume. You can add an extra set or increase the number of reps that you perform.
Just as a final confirmation of my nerdiness, here’s my Excel spreadsheet that calculates my training volume. If you want the same level of nerd gains as me, I suggest you make one too!
Found these 5 tools useful? Don’t forget to use the links on the side of the page to share!
JB